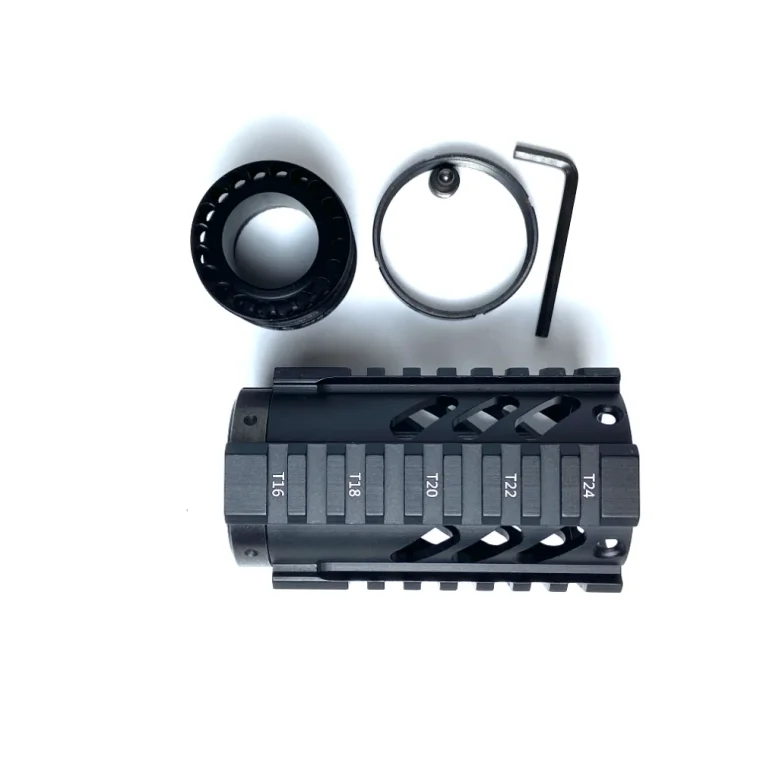
If you’re upgrading or building your AR-15 rifle, one of the most important components to consider is the 223 handguard. It not only enhances your weapon's appearance but also plays a crucial role in heat dissipation, accessory mounting, and overall shooting comfort. While the installation process may seem intimidating at first, with the right guidance and tools, even beginners can achieve professional-level results.
This guide will walk you through the basic steps of installing a 223 handguard, along with pro tips to help ensure a secure fit and optimal performance.

Why Upgrade Your 223 Handguard?
Before diving into the installation process, it’s important to understand why the handguard matters:
-
Improved Heat Resistance: Prevents your hand from getting burned during sustained fire
-
Customization: Allows attachment of lights, grips, bipods, and more
-
Accuracy Enhancement: Free-float handguards reduce barrel interference for better shot consistency
-
Aesthetic Appeal: Gives your rifle a tactical, modern look
Whether you're preparing for the range or customizing a duty rifle, upgrading your handguard is one of the most effective and rewarding enhancements.
Tools You’ll Need
-
Armorer’s wrench
-
Vise and upper receiver vise block
-
Allen keys or Torx drivers (depending on hardware)
-
Punch set and rubber mallet
-
Anti-seize or thread locker (optional)
Make sure to wear safety glasses and work in a well-lit, secure workspace.
Step-by-Step Installation Guide
Step 1: Unload and Disassemble Your Rifle
Safety first. Remove the magazine, ensure the chamber is clear, and separate the upper and lower receivers.
Step 2: Remove the Old Handguard
Depending on your rifle, this could involve removing delta rings or unscrewing handguard retention bolts. If your AR uses a standard two-piece handguard, compress the delta ring and slide out the pieces.
Step 3: Remove the Barrel Nut (If Needed)
If you're switching to a free-float handguard, you may need to replace the barrel nut. Use your armorer’s wrench to carefully remove the old nut and install the new one included with your handguard.
Step 4: Align the New Handguard
Slide the new handguard onto the barrel nut or mounting interface. Ensure it's aligned properly with the upper receiver rail for a seamless fit.
Step 5: Secure the Handguard
Tighten the mounting screws as instructed by the manufacturer. Apply thread locker for additional security if desired.
Step 6: Reassemble Your Rifle and Test Fit
Reconnect the upper and lower receivers and check the alignment and stability of the handguard. Attach accessories if needed and head to the range for a functionality test.
Why Choose Quality Handguards from Trusted Manufacturers?
As with any firearm upgrade, quality matters. Low-grade materials or poorly machined parts can lead to misalignment, reduced accuracy, or even safety risks. That’s why many shooters trust Nantong Junyuan Sports Goods Co., Ltd. — a leading manufacturer of premium firearm accessories.
Specializing in gun stocks, handguards, and other rifle components, Nantong Junyuan is dedicated to providing innovative, reliable, and high-performance products for both enthusiasts and professionals. Their commitment to precision and durability ensures that every component you install contributes to the strength and accuracy of your build.
Final Thoughts
Installing a 223 handguard may sound like a job for gunsmiths, but with the right guidance and components, you can do it yourself — and do it well. Choose a high-quality handguard, follow each step carefully, and you’ll not only enhance your rifle’s performance but also gain the satisfaction of personalizing your build.
For shooters looking for trustworthy firearm accessories that combine craftsmanship and innovation, Nantong Junyuan Sports Goods Co., Ltd. offers the performance you need and the quality you can count on.
www.junyuanhandguard.com
Nantong Junyuan Sports Goods Co., Ltd.


